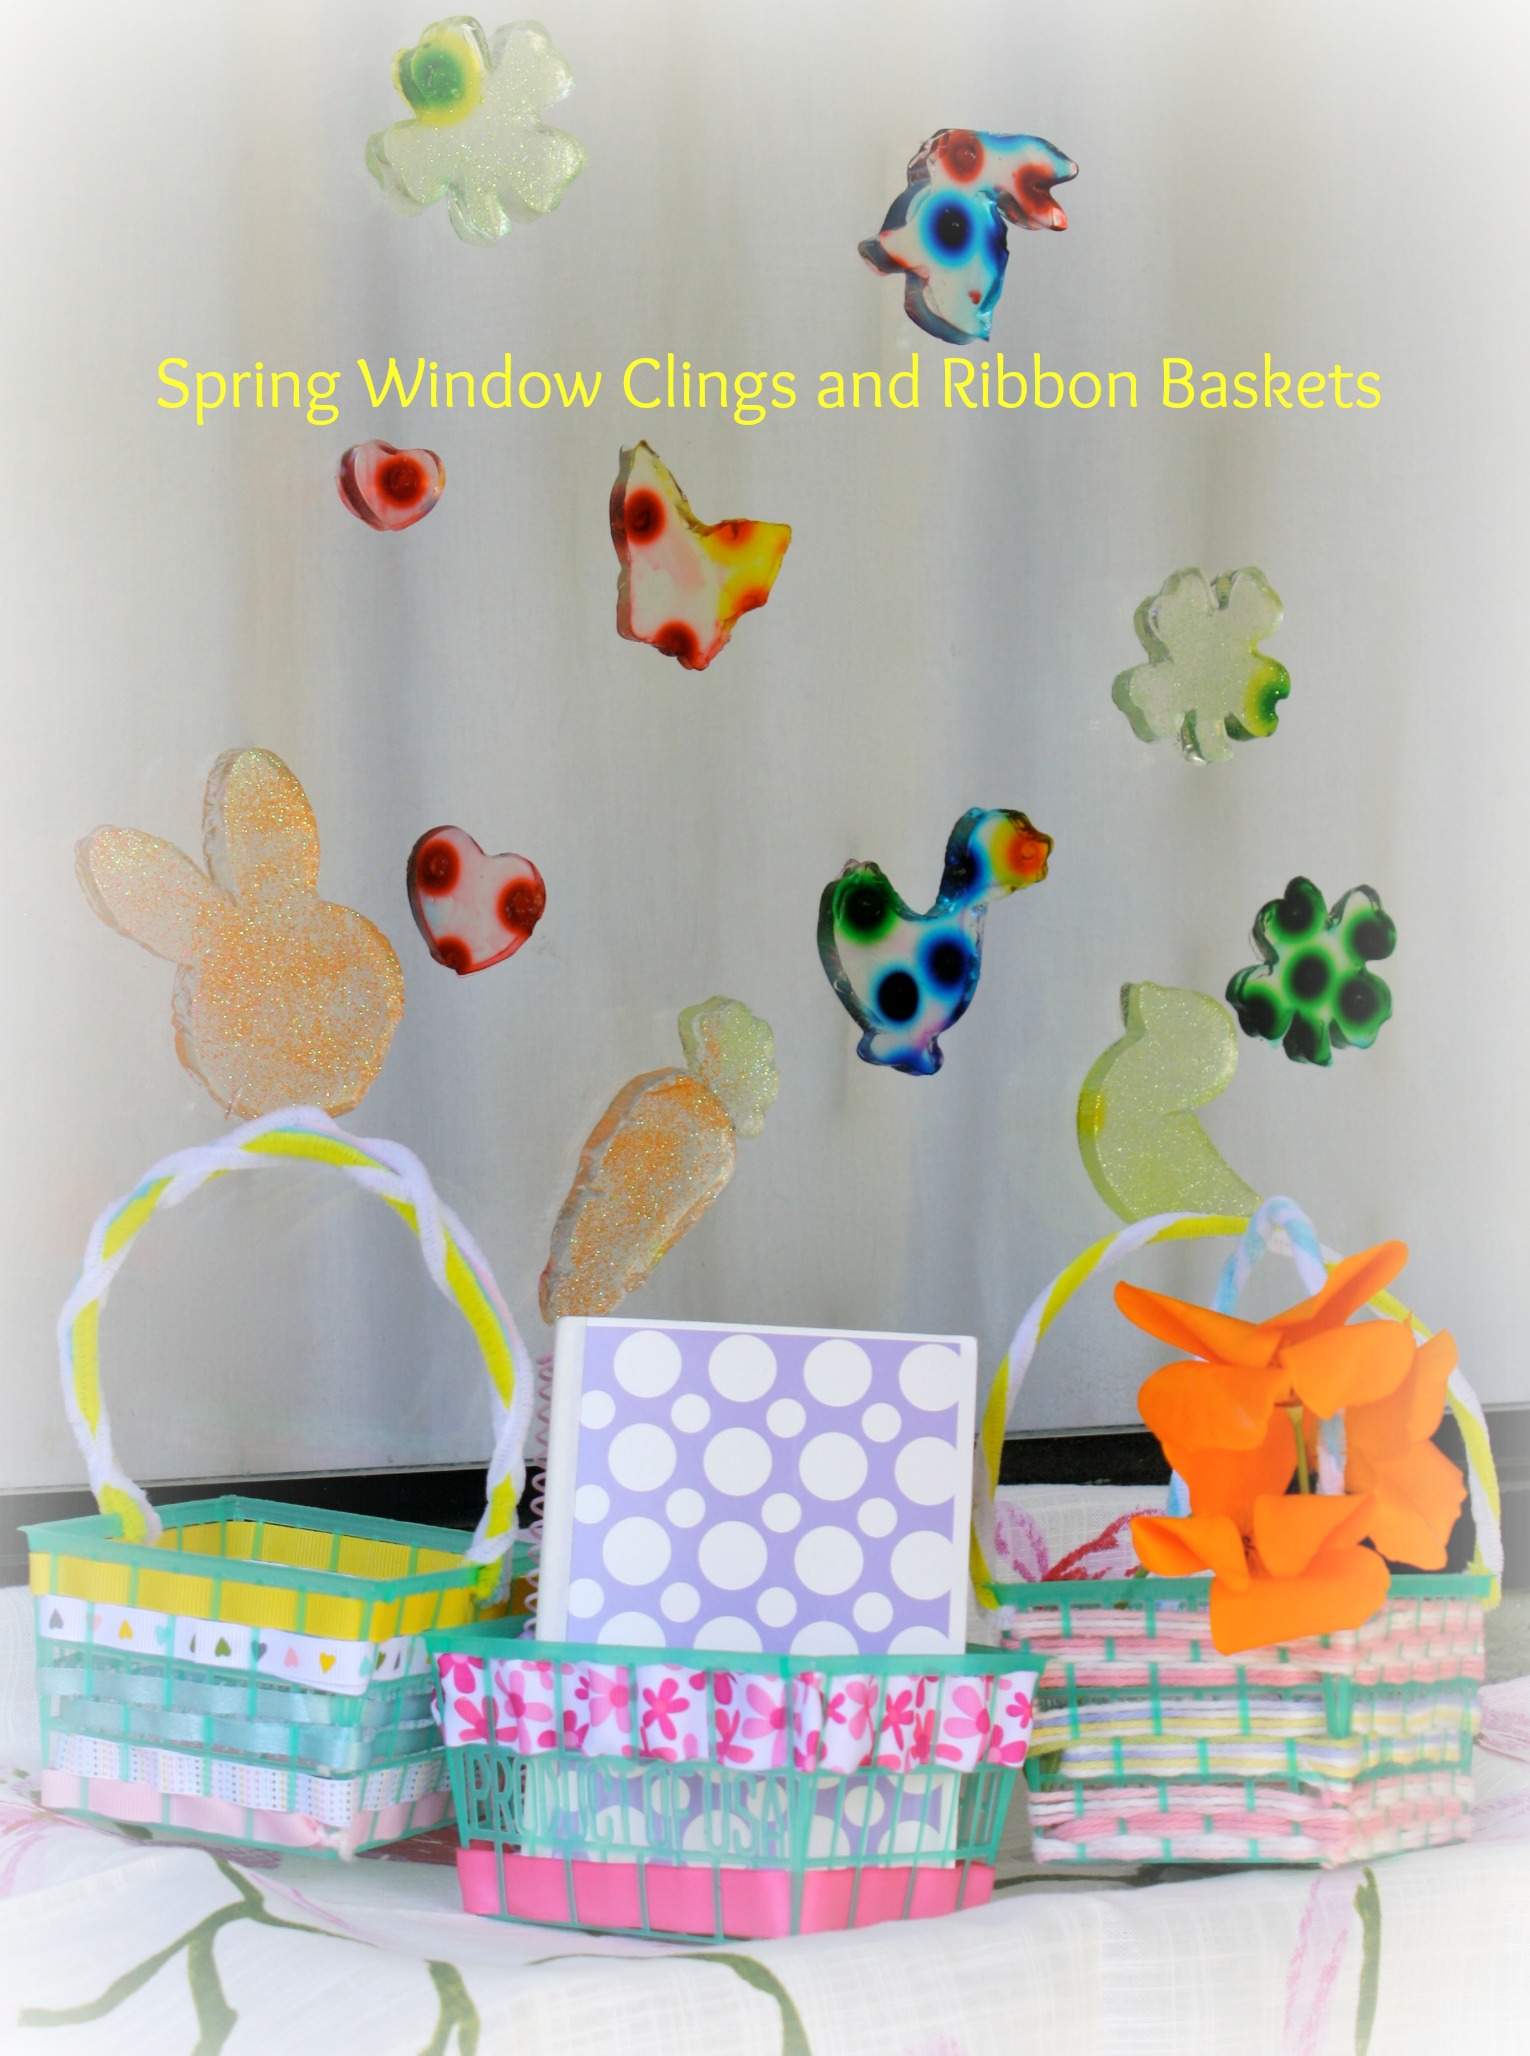
Since Spring begins this week I’d like to show you how to make some Window Clings and Ribbon Baskets with your kids to help you prepare for the season.
My oldest child made the Window Clings as part of her science experiment this year and we had so much fun the first time, we decided to make them again! There were some things I wanted to do with her batch that I couldn’t because it was her project so this allowed me to get creative with this craft.
Decorating berry baskets was something we used to do in grade school, using strips of construction paper instead of ribbon or yarn. I like this craft because its cheap, you use what you have, and your creativity is the limit!
Window Clings from KidScience App
Materials
1.5 oz (6 packets) plain, unflavored gelatin
water
food coloring
drinking straw
cookie cutters
glitter (optional)
Method
Boil 4 cups of water. Open the unflavored gelatin packets into a small bowl. Stirring as you go, slowly pour the gelatin into the boiling water. Stir well until the gelatin has dissolved. If there are any bubbles, remove them with a spoon.
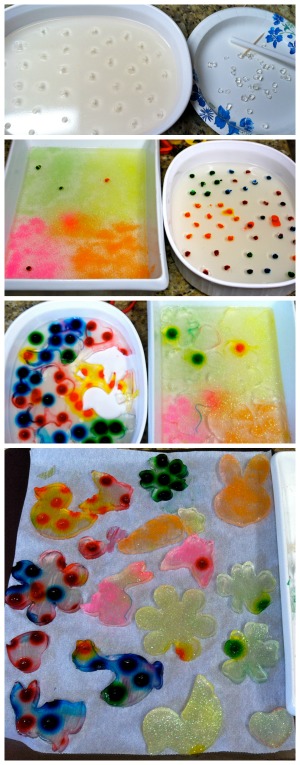 Allow the gelatin to cool a bit, then pour the liquid gelatin into two large pans so that the liquid measures 1-1.5 cm deep.
If using glitter, now is the time to sprinkle glitter onto one of your pansof gelatin…or both, the diffusion with the food coloring will still occur with the glitter pans but the glitter clings can only be hung outside (or facing in) so that is why I only do one pan.
Let the gelatin harden in both pans. This should take about an hour or so. Using one end of a straw poke holes straight into the gelatin but not all the way to the bottom. Spin the straw, then use a toothpick or skewer to pull out the gelatin plug you’ve made. Sometimes I would just tilt the straw and use it to pull out the plugs as well. Poke lots of holes into the gelatin a few centimeters apart. The food coloring will diffuse in the glitter pan as well if you want to make a few holes in that one.
Add a drop of food coloring to each hole in the gelatin. Keep the shapes of your cutters in mind if you want to make a shape a certain color. Science experiment spoiler alert!: Greens and yellows diffuse the best and fastest, then blue, and red not so much.
Let the pans sit for 24 hours, then use cookie cutters to cut shapes from both pans of gelatin and carefully remove them with a spatula. I remove them all at once onto a cookie sheet so that I can take them all to decorate my windows instead of one at a time. The food coloring will continue to diffuse while the clings are on your windows. When they dry, peel them off the windows. The clings will last 3-4 days.
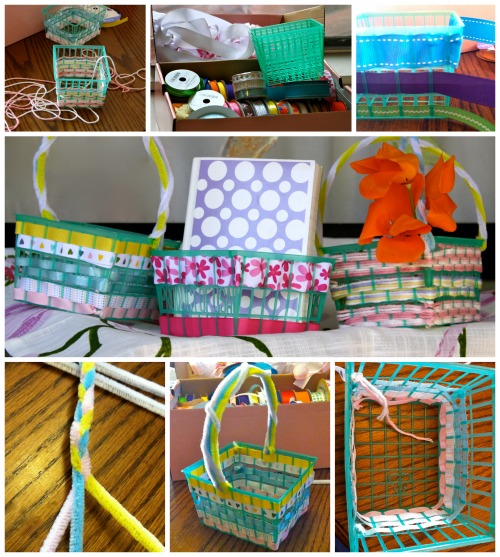 Ribbon Baskets
What You’ll Need
plastic berry baskets
ribbon or yarn
glue
pipe cleaners (optional)
Method
Thread your ribbon or yarn through the hole of your basket, starting at the bottom. Again, you can make these very simple by skipping a few and making large weaves or more intricate by weaving through each opening.
With my yarn basket, I wove through each opening, skipping one as I got three lines on each side so that I would have an alternating pattern (I used a total of nine lines). I used a simpler pattern in the middle (two lines of four) because it was a little tricky weaving through the “product of USA” on the basket. I used the same pattern on the top portion of my basket as the bottom. I tied the yarn to the basket as I began to keep it in place. I also pre wrapped the yarn around my basket to get an estimation of how much yarn to use so I could pre cut it to make it easier for weaving.
I used the pipe cleaners to make my handles. Those were the one thing I had to buy which was surprising considering all the odds and ends I have. They are very easy to work with and hook onto the baskets with ease.
With the pastel basket, I used 6 different 3/8” ribbon and threaded them alternately. I tied yarn to the ends of the ribbon and then tied it to the basket to keep it in place. When finished with a row, use a small dab of glue to fix the ribbon to itself to keep it in place.
With my hot pink basket, I used a 7/8” ribbon on the top (with which you can make the cutest ruching effect) and a 5/8” for the bottom which lays perfectly in that opening. I decided not to use a handle on this basket. It is being used to keep my little girl’s various notebooks organized.

Celina Atkinson
Latest posts by Celina Atkinson (see all)
- Things to Do in the Inland Empire With Your Pre-Teen - June 23, 2014
- Spring Crafts for Kids - March 18, 2014
- Things to Do In Inland Empire –Moreno Valley with Kids - March 14, 2014
Speak Your Mind